DISTRIBUTOR – Major repair operations
Bench dismantling
- Remove the distributor and place it in a vice.
- Remove the rotor. Remove the spring clip securing the diaphragm link to the movable breaker plate. Disconnect the diaphragm assembly from the distributor base.
- Lift the diaphragm link off the pin and remove the diaphragm assembly.
- Disconnect the primary lead wire and the condenser wire from the breaker point terminal.
- Working from the inside of the distributor, remove the primary lead wire by pulling it through the opening in the distributor.
- Remove the condenser.
- Remove the breaker point assembly.
- Remove the lubricating wick. Using needle nose pliers, remove the cam retainer.
- Remove the movable breaker plate spring retainer and washers.
- Remove the stationary sub-plate retaining screws. Remove the sub-plate, breaker plate, and cam as an assembly.
- Remove the upper thrust washer.
- Carefully unhook and remove the distributor weight—springs. Mark each spring, bracket, and adjusting post to which it is attached.
- Remove the weights.

|
14. Remove the distributor cap clamps.
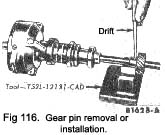
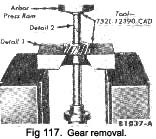
15. If the gear and shaft are to be used again, mark the gear and shaft so that pin holes can be easily aligned for assembly. Remove the gear roll pin (Fig. 116) and then remove the gear (Fig. 117).
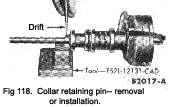
16. Remove the shaft collar roll pin (Fig. 118).
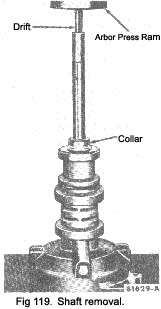
17. Invert the distributor and place it on a support plate in a position that will allow the distributor shaft to clear the support plate and press the shaft out of the collar and the distributor housing (Fig. 119)
18. Remove the distributor shaft bushing (Fig. 120).
Cleaning and inspection
Soak all parts of the distributor assembly (except the condenser, breaker point assembly, lubricating wick, vacuum diaphragm, distributor base oil seal, and electrical
|
 **
**


