A Tiger Rotisserie Design
An Article by Wally Menke
February, 2001
Editors Note: This Barbie Rotisserie is from the 'Merry Old Land of Oz'. Wally Menke (Sunbeam Car Club of Victoria) presents his drawings and photos of how this Australian designs his Barbie rotisserie for both shrimps, and Tigers, mate.
Dimensions are in "native' metric, but have been shown in "English" units, as well. Although the drawings are not necessarily to scale, and do not show all the details, the text does describe the additional support of a structural insert into the jacking point ports. - Editor
Page 1
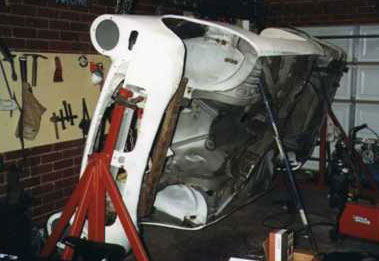
This is a guide for those planning to use the rotisserie system that allows you to rotate the complete car body & chassis around for ease of access and work. Once you have worked on your bare car this way you’ll be convinced it’s the only way.
Note: That at all times think safety! Always prop-up and stabilize the car so that it doesn’t shake and move. Have all the welding performed by a professional
1. Make sure that all mechanical and body parts are removed from the car to minimize its weight.
2. Check that the car is structurally sound especially the main chassis rails that will support it are the anchor points. The rotisserie uses the 4 mounting bolts of the bumper bar, and the jacking points just underneath them.
3. Ensure that the bumper bolt mounting points are sound and that the internal nuts that hold the bolts in are in place and complete.
4. Purchase 4 1/2" UNF x 4.5" Grade 8 bolts. Make sure these fit into the bumper bar mounting points correctly and mount straight, horizontal & parallel
5. You will need about 4 ft of _" (1.2 m x 20 mm) square tube or solid section to fit into the jacking points, and the same length of _" x 1/8" (20 x 3mm) angle iron. Cut these into 4 x 12" (30 cm) sections. The angle you will need to weld onto the rotisserie brackets then weld these onto the square section that will be in the jacking points.
6. Measure the bumper bar bolt center distances front and rear accurately and have the rotisserie mounting brackets fabricated to these dimensions
7. Mount the rotisserie brackets with the 2" pipe facing outward onto the car using the 4 x 4.5" bolts. You may need also to use the original spacers used on the bumper brackets and extra washers to get the spacing correct. Tighten the bolts making sure the pipe is horizontal and straight.
8. Fit the square steel tube or solid sections into the jacking points so that they protrude about 2" (50 mm) in front of the rotisserie bracket now fitted on the car bracket. Make sure they are inserted at least 3" (80 mm) into the jacking point.
9. Hold the piece of angle with a flat against the rotisserie bracket inside the mounting bolts with the other flat pointing out so that the square tube now sits on the angle as well. Tak weld the square sections into the jacking points on all four sides
10. Now fully weld the angle to the rotisserie bracket and the square tube so that full strength is gained.
11. Cut off with an angle grinder any access angle and square section.
12. You are now ready to lift the whole car up onto the main frame of the rotisserie.
13. Once you have the car into the frame make sure you fit safety bolts onto the outer holes of the brackets.
Happy Spinning, Mates
 **
**