CLUTCH UNIT
Description
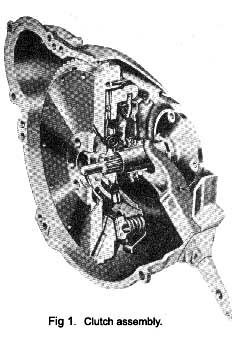
The clutch is of the centrifugal single dry disc type and consists of the clutch disc, pressure plate, and the clutch release bearing (Fig. 1). The clutch is actuated by a clutch pedal and a hydraulic linkage.
To remove
With engine and gearbox removed (See Section B)
Remove the bolts that attach the gearbox to the flywheel housing.
Move the gearbox rearward until the input shaft clears the flywheel housing.
Remove the flywheel housing cover.
Remove the release lever retracting spring. Then slide the release bearing and hub off the release lever. Loosen the six pressure plate cover attaching bolts evenly to release the spring tension. If the same pressure plate and cover is to be installed after the clutch is overhauled, mark the cover and flywheel so that the pressure plate can be installed in the same position.
Remove the cover, pressure plate and the clutch disc from the flywheel.
Remove the clutch release lever.
CLUTCH INSTALLATION
- Install the clutch release lever.
- Place the clutch disc, pressure plate and cover assembly in position on the flywheel. Start the cover attaching bolts to hold the pieces in place but do not tighten them. Avoid dropping the parts or contaminating them with oil or grease.
- Align the clutch disc with the Tool No. T6IK-
6392-A and torque the six pressure plate cover attaching bolts evenly to specification. Then remove the tool.
- Place the release bearing and hub on the release lever. Coat the bearing retainer inside diameter with a light film of lithium-soap type grease.
Do not lubricate the bearing hub.
|
5. The mounting surfaces of the gearbox and the flywheel housing must be free of dirt, paint, and burrs. Install two guide pins in the flywheel housing lower mounting bolt holes. Move the gearbox forward on the guide pins until it is tightly positioned against the flywheel housing.
6. Install the two upper mounting bolts. Then remove the guide pins and install the two lower mounting bolts. Torque all bolts to specification.
7. Refit engine and gearbox (See section B).
|
 **
**