How To Install a Radio in Your Sunbeam
By Tod Brown
Jan. 2002
Editor's Note:
Tod has shown us the details of his under-dash radio installation in his Tiger, including speaker placement. For an alternative comparison, I have added photos of my speaker placement. The radios use similar universal housings, available at auto parts stores of the Pep Boys type.Steve
Page 1:
As many know, an AM radio was an option (LAT 72) that was fitted to many Tigers when they were first purchased and some Tigers still retain that original radio for the sake of authenticity. However, for those who wish to take advantage of some of the advances in technology in car audio that have evolved in the last 35 or 40 years, I will describe how I went about installing an audio system which, although it is not “state of the art”, is a vast improvement over what was available in the ‘60’s and was done for a reasonable cost.
I. Choosing a Radio and Mounting It
In choosing a radio, one has many choices, and just about anything can be made to work given enough time, money and creativity. When the Tiger first appeared, most of the radios installed in cars had two shafts protruding from the face, one for volume and the other for tuning the stations. It is still possible to find such radios, but they are fading fast (no pun intended) but, if you want to retain some appearance of period correctness, then such units might be a good choice. Many more radios available these days have what some call a “flat face” with no protruding shafts and fit in a standard opening referred to by the acronym “DIN”. Many of these units have fold-down and/or detachable faceplates, which provide access to CD players and discourage theft (an important consideration in an open car like the Tiger). To find out more about all of the features available and the wide range of available units, a good source is the Crutchfield catalog (free by calling 1-800-955-3000 or visit their web site http://www.crutchfield.com). They offer the do-it-yourselfer all sorts of help and can provide just about any kind of equipment you might want. I chose a receiver by Clarion that provides AM & FM reception as well as a CD player. I was able to purchase my receiver on eBay for a reasonable price, as it was a model that was a couple of years old. The manufacturers are constantly adding new features so, if you are willing to give up some of the cutting edge bells and whistles, you can find some bargains. Next, I had to figure out a way of mounting the receiver under the dash. Fortunately, Crutchfield (and probably others) offers a “Universal Underdash Kit” (Item # 120999000) that allows one to mount either a shaft-style or DIN chassis in the housing which then attaches under the dash.
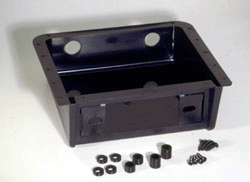 As can be seen in the photo to the left, the housing has knockouts on the front to accommodate the receiver and, also, holes in the back to allow for the wiring harness, antenna, etc. to connect to the receiver. In keeping with the suggestion in the instructions that came with the kit, I sliced off the back of the kit to allow easier access. If you look up under the dash, you will notice two metal brackets, about 12 inches apart, that extend into the passenger compartment from the firewall and support the fascia. In order to support the rear of the housing, it is necessary to fabricate a support that runs approximately 6 inches behind and parallel to the dash, connecting the two metal brackets. The support can be either metal or wood (I've used both). The housing can then be mounted under the dash using the sheet metal screws provided. It will be necessary to pre-drill some holes for the screws in the rear support bracket and through the vinyl roll on the bottom of the dash into the metal underneath. That done, the receiver can be mounted in the housing following the appropriate instructions for your receiver provided with the kit.
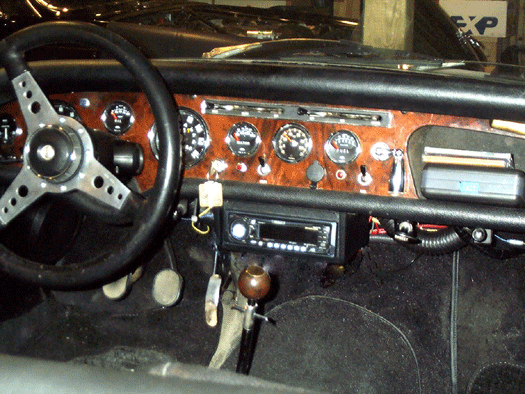
Housing with radio installed
II. Speakers
Four-channel stereo was not something the Alpine and Tiger design team provided for, so finding a place for multiple speakers in your car is not exactly straightforward, but not a large problem. I found some usable spaces for my speakers in the under dash kick panels in front of the doors and in the vertical panel behind the jump seat. In my MkIA, I found rectangular cutouts in the sheet metal behind the vinyl kick panels and mounted a pair of 5.25 inch speakers. Other sizes and shapes would surely fit as well. First, remove the kick panels and run a pair of wires from the back of the receiver housing to the area behind the kick panel. Cut holes in the kick panels so that the rear of the speakers can protrude into the space behind the kick panels. The holes do not have to be as large as the speakers – you only need to allow the rear of the speaker to pass through.
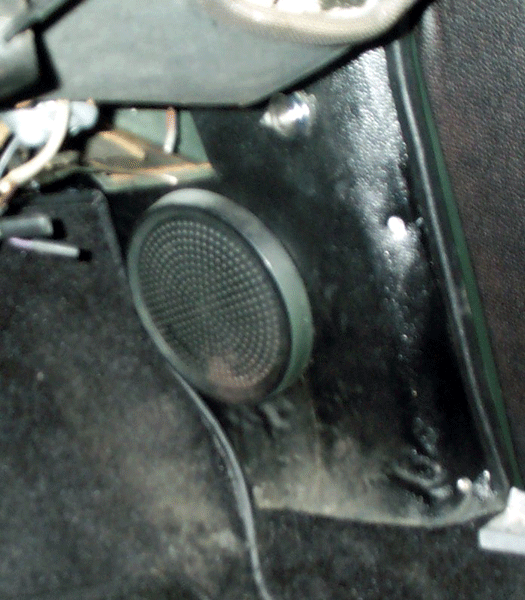
Front Speakers in side panel
Make sure that the speaker lugs won't touch any of the sheet metal when placed in position and connect the wires to the terminals with insulated connectors. Drill a few holes into the sheet metal and secure the speakers with sheet metal screws. Place the speaker grills over the speakers and you're done with that part. You can see my finished product in the photo above.
The speakers that I used behind the jump seat are 6 inches in diameter but, again, other sizes and shapes can be accommodated. In my car, the sheet metal behind the jump seat is fixed in place and covered with a vinyl trim panel unlike the earlier cars that have a movable metal panel.
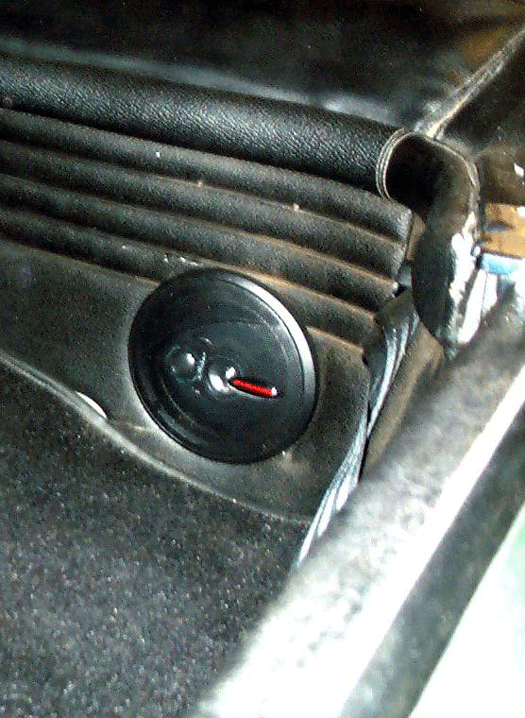
Speakers on rear upholstered backing of the shelf of MkIA (Mk II)
Either way, it will be necessary to cut holes in the sheet metal to accommodate the speakers. When I chose the speakers for my car, I used ones that are not very deep to make fitting them a bit easier. My speakers also came with templates that could be used to cut the holes in the sheet metal (and upholstery). It can be a little tricky cutting the holes with the usual tools, so you might want to rent or borrow a large hole saw or farm out the cutting to a body shop. Be careful where you choose to mount the speakers as there is not a lot of space behind, especially at the bottom. Once mounted, I have found that the speakers do not interfere at all with the operation of the top on my car. Since I have not done this on cars with the movable metal panel, check carefully before proceeding. If you use sheet metal screws or similar, make sure that the sharp points will not contact the top when folded. Wiring should be done as described for the front speakers.
 **
**