Page 5
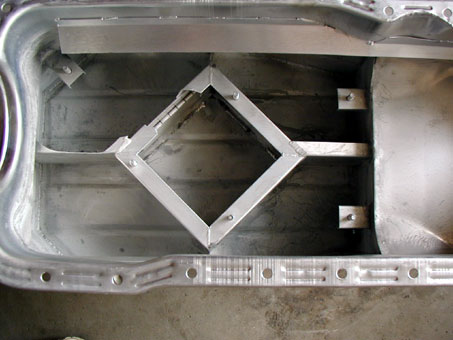
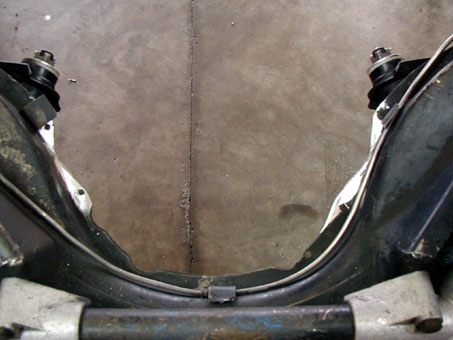
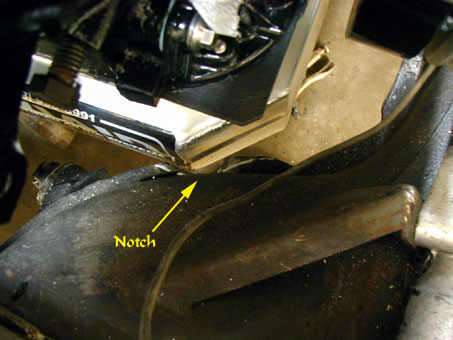
All of this investment will rely heavily on good oiling so I decided on one of the Aviaid Road Race pans that Dale Akuszewski from Dales Restorations in San Bernardino sells (see TigersUnited Links Page). The pan is very well made (see pictures Aviaid Pan Inner and Aviaid Pan Baffles) but unfortunately is not quite trimmed enough for the Tiger cross member and I had to slightly notch the cross member for adequate clearance (see picture Notched Crossmember). To fit perfectly the front of the two side tapers of the pan need to be brought in about 1/4 of of inch more to provide decent clearance on each side this visible in the picture Oil Pan Clearance (or Lack thereof). The pan is significantly in the way of the crossmember and may in fact require that I remove it to install the engine in the top due to interference with the steering rack. The pan has an integral windage tray and interior baffles and seems pretty functional but is not as “refined” as some of the other pans I have run in the past like Hamburger or Barnes.

Aviad Pan Inner

Aviad Pan Pan Baffles

Notched Crossmember

Oil Pan Clearance
Motor mounts
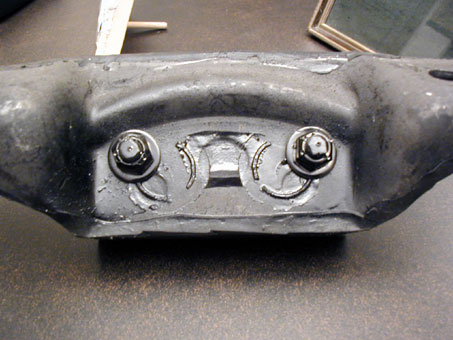
When I pulled the original Tiger engine out, the engine mounts literally fell off of the engine on one side and the other was barely holding on the other side. Looking at the mounts they are only a bonded rubber version with no provision of interlocking to prevent the mounts from tearing apart under severe use. As a result I searched around for some way to resolve this and a friend in Canada, Jim Foster, built a sunspot Yellow 331 powered all out “Alger” that solved this problem very neatly. You simply drill through the motor mount and counter sink 3/8 or 5/16 inch Allen head tapered seat bolts into the face of the motor mount and then use stainless and nylon-locking nuts to retain the mount. You leave the nuts barely tight with some actual clearance left from them actually being snugged up. This permits the mount to move and absorb the engine vibrations as you drive normally BUT when you stomp on the throttle the mount stretches to the bolts extension and you have a safe and effective torque strap. With all of the Torque and Horsepower I plan on putting into the Tiger I thought it would be a good idea as the last thing I want is the entire engine to lean over and hold the throttle at wide open …. “YYEEEEE HAAAAAA!” In the pictures Motor Mount Stop 1 and Motor Mount Stop 2 you can see the flush face of the mount and where the bolts and nuts protrude on the rear side.

Motor Mount Stop 1

Motor Mount Stop 2
Ok, that’s it for now I hope this is helpful, or at least enlightening. It sure was for me.
I can be reached at my home email: timinca@inreach.com or at my Company email: timothy.ronak@akzonobel.com I am located in Mission Viejo California. Hopefully I will see everyone at SUNI 2002.
The future updates will be the actual installation of the trans and the maybe a shifter rebuild. After the last details of the rebuild I hope to do a detailed installation of the whole thing in the top of the engine bay.
Next Article (YET TO COME) Installation of the 350 into the Chassis and all of
the fiddling and parts interchange stuff)
 **
**


