"A Tiger Reverse Cold Air Scoop"

An Article by Larry Paulick
April, 2003
Page 2
The next step was to make an air box to fit and seal the hole in the hood, under the air scoop, to the carburetor
The base of the air box was “stepped up” using a bead rolling machining, so that the base of the air box, would match the bottom of the stock Tiger air cleaner, which already has a flange to mate to the carb.
When you do this, you stretch the metal, and the base of the air box will be distorted or twisted. Don't worry; the vertical portion will stiffen the assembly.
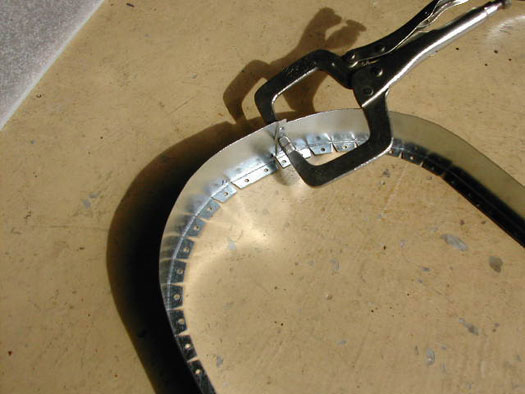
Vertical portion of air box
Rough air box
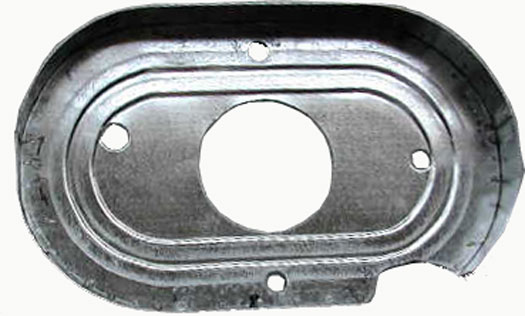
I then made some rough measurements on the vertical portion of the air box, which mates to the underside of the sloping hood, and fabricated this vertical portion of the air box in 4 parts.
Rough air box bottom side
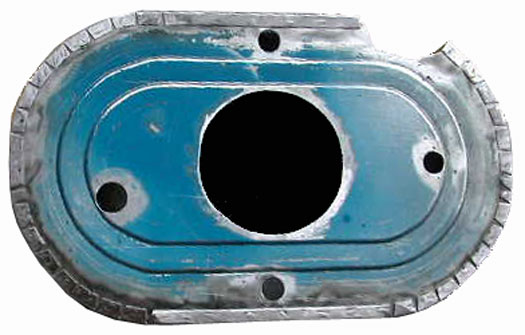
I then clamped a 3/4” cut to fit piece of plywood to the base, clamped the vertical portion of the air box to the base, and tack welded the vertical portion to the base. This final assembly was very rigid, and there was no more distortion or twist in the base.
Rough air box before cutting to fit hood
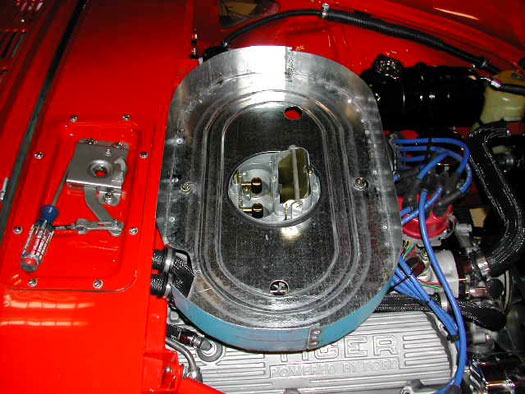
I use a Holley double pumper carburetor, and the float bowl adjustment have to have a hole cut in the base of the air box for these nuts. You also have to cut holes for the vacuum tube from the electric choke, and the breather vent on the left side to the valve covers. These holes also serve as a drain if there is water drawn into the box from the hood vent.

Air box cut to fit, powder coated and rubber seal
In my case I also had to make a “box” around the 2 water lines coming out of the right side of the firewall. These 2 hoses are for the relocated water heater valve located next to the heater core, under the hood latch.
Using modeling clay, I then determined the final height of the vertical portion of the air box, by closing the hood, seeing the gap, or lack there of, and cut it to fit the slope of the hood. I added a rubber-sealing ring around the vertical portion of the air box, to finally seal to the underside of the hood.
I used the same seal as the Tiger trunk seal, as it has a vertical finger grasp area, and a curved rubber seal at the top. Worked great, and thanks Joe P. This is also important as you have little room for a seal at this location.
This rubber seal is necessary, not only for good sealing of the fresh air to the box, but to allow for movement of the engine on the motor mounts, relative to the fixed hood.
I then used an Eastwood Hammer tone Power Coat to finish the box, and again thanks Joe P.
 **
**