"TREMEC 5 Speed Installation"
An Article by Curtis Fisher
May, 2002
Page 2
THE CUTTING
I made up many templates to help figure where to cut. The transmission outline was installed as shown to identify where to create area. I measured, re-measured, and measured several times more. Having seen Tom Hall’s mods to ‘Bomber’, I knew the internal design of the tunnel and how to open the area. I started by cutting the front of the hump and then the top. I used a air grinder with a 3 inch wheel, good control, not too fast, easy to control. You can see the outlines I've drawn and a clamped on guide to assist in straight cuts.
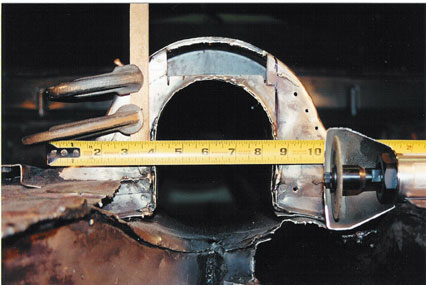
Making Straight Cuts is Important
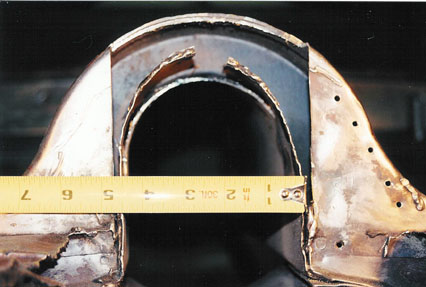
This exposed the inner drive shaft tunnel which was cut back to the same distance as the top. The inner top was cut in the middle and the sides folded out to form the new sides.
Fabricated Housing
A new front face for the inside was fabricated and installed to completed the box. The resulting pieces were MIG welded together to form a strong box structure prior to welding the new tunnel housing on top. With the larger and slightly thicker tunnel metal used with better support locations, the resulting assembly is stronger than the stock housing. The fabricated housing is shown here.
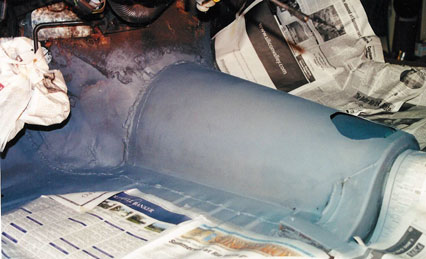
Primed Tunnel with "added" driver room
The factory leaves a wider floor opening on the drivers side than the passenger side (about 8 inches vs. 6 inches on the passenger side) to allow room for the 4-speed shifting mechanism. Since the TREMEC does not need this, you can move the firewall to the right 2-3 inches and give the drivers foot more room and even relocate the throttle pedal for additional comfort. This requires a wider ‘lip’ on the tunnel housing drivers side. The required area for a mechanical or hydraulic clutch fork is eliminated.
I used a Centerforce Dual Friction clutch with a McLeod hydraulically actuated thow-out bearing. This eliminates the need for a actuating fork, as well as the stock external hydraulic clutch slave actuator. Installation was easy when you follow the directions. The 90 degree fittings and connection lines are shown here. The cover plate was fabricated from Delrin and tapped to the housing. 12 months of trouble free service and counting….
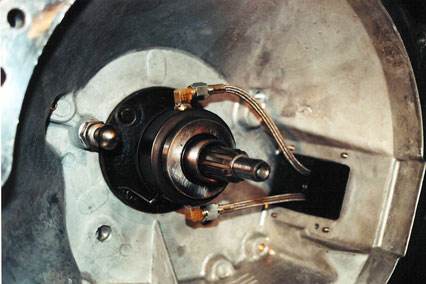
McLeod Hydraulic Throw-out bearing Actuator
 **
**