Sound Advice
or
"How to Have Excellent Audio With Original Appearance"
By
Shaun Laughy
Feb. 2003
Page 2:

Exposed
The CD changer was a bit tougher, but we thought a great solution would be to sit the changer inside the old Alpine spare tire well, and build a flush panel at the forward end of the trunk to cover this area in. Actually, this panel was already in place, on my car, as a previous owner had had the trunk re-carpeted and they must have found this easier to complete by covering over the well with a flat panel.

Covered
Therefore, we felt that it would be possible to place the unit behind this panel with only a small access panel to facilitate changing the disc cartridge..
In With the New
The install of the electronic components went pretty much as planned with the head-end and the amplifier placed under the seats. To provide extra space for the tight-fitting amp, the standard carpet underlay was removed and a super-thin acoustic insulation material was put in its place. Both of these units were attached without putting any holes in the car, as the amp was a tight-enough fit, and the head-end was attached to a wooden panel that was glued to the floor with a strong adhesive.
The CD changer was a great fit in the spare tire well and, again, to avoid making any holes, the entire assembly was mounted to a wooden panel that was cemented to the metal with a strong adhesive. For appearance and protection, a removable enclosure was placed around the changer providing a nicely finished look. The only downside is that I don’t think I’ll be able to fit a spare tire in there anymore. This could have been avoided with a bit of additional planning and it’s probably something I’ll adjust at some point. In the meantime, I’ll carry a bottle of Fix-A-Flat and keep my auto club membership current.
Now you see it
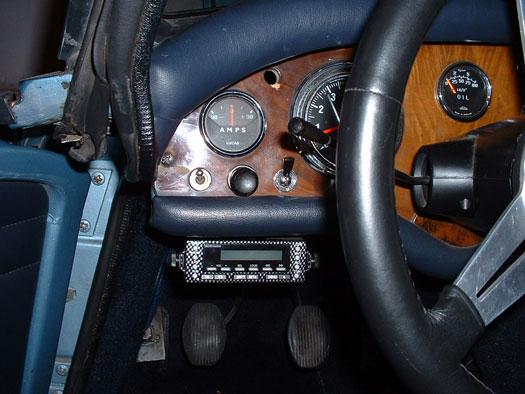
The remote LCD control unit was a little more challenging, but we finally decided to place it on the driver’s side, just below the windshield washer pump and wiper switch.
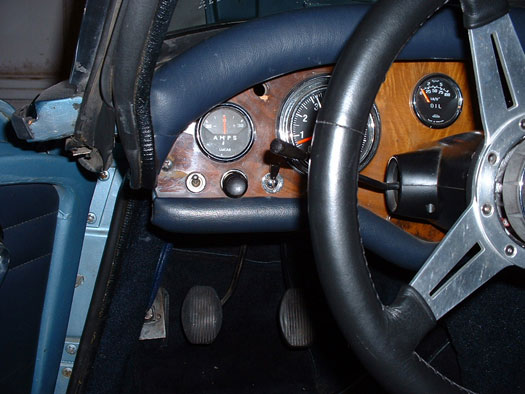
Now you DON'T!
We attached this unit using a hinged bracket, which allows the unit to be pulled forward for use, or pushed up out of the way so it is completely invisible. I can even leave it tucked away while using the system as I can choose to use the wireless RF remote instead (included with the Secret Audio system). One word of caution is that the range of the remote is much less than I expected, given the “up to 40 feet” claim made by the Secret Audio folks. I will be playing with the RF remote antenna placement, though, so this may get better.
 **
**