"Speedo Rebuild"
or
"You were going HOW fast?"
An Article by Larry Paulick
April, 2002
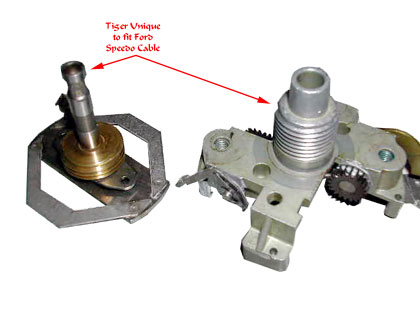
Disassembled
Remove the spring clip, and disassemble the arm and gear and shaft, from the cast portion.
Do only one assembly at a time, so you don’t mix the gears and arm assemblies.
After removal, clean the parts, and the bore in the cast piece. I used alcohol and pipe cleaners, which worked quite well.
After the parts are clean, lubricate the shaft, arm, and gear, where they come in contact with other moving parts. I used Lithium grease, applying it with a pipe cleaner.
Do like wise with the other gear and arm assembly.
Speedometer Re-Assembly
Reassemble the gear, arm and retaining clip.
The cast portion where the moving part I called the shaft with magnetic assembly can now be cleaned. I cleaned the bore in the cast piece, the shaft, and the brass worm gear. I did not clean the bearing surface of the plate, which has the 2 brass screws going through, that rides on the center shaft of this mechanism.
This area appeared clean, moved freely, and if I did lubricate this area, I would want to use clock oil.
Like wise, I did not clean the end of the shaft that the needle shaft rides on. This area appeared clean, and I would want to use clock oil, if it needed lubrication.
After you have finished this portion, assemble the shaft in the cast portion, and reattach the 2 brass screws.
You have now finished cleaning and lubricating the mechanical back portion of the speedo.
I looked at the 2 odometer mechanism, and they appeared to be clean and did not need to disassemble, clean, and lubricate.
The assembly is the reverse. Of course, you will want to clean the faceplate, glass, and add a new sealing o-ring, if needed. I used water and a clean paper towel to carefully clean the parts.
Be very careful, in putting the 2 springs on the arms that turn the odometers. They can get away from you very easily, and are hard to replace.
Also be very careful in assembling the front and rear of the speedo. You want to carefully reassemble the parts, so the needle spindle mates into the back portion of the speedo. Then put the 4 screws to hold this entire assembly together.
When you have the front and portion of the speedo together, put in back into the can, with the spring, and 3 different washers, on the odometer reset shaft, and add the screws in the back to hold the speedo mechanism to the can.
Place the faceplate on the mechanism, and secure with the 2 screws.
On the faceplate, there is a white dot, that is about minus 5 mph. Carefully place the needle on the shaft, so that the needle is pointing at the minus 5 mph white dot. Do this with he speedo, in its normal position, i.e. with the faceplate vertical. Make sure that the needle is pointing to minus 5 mph.

Before Needle Stop Insertion.
Now using a small pair of pliers, push the needle stop into the speedo, and move the needle to the positive side of the mph. The needle will now be preloaded, and rest against the needle stop. I understand that this is how the needle was set up in the factory.
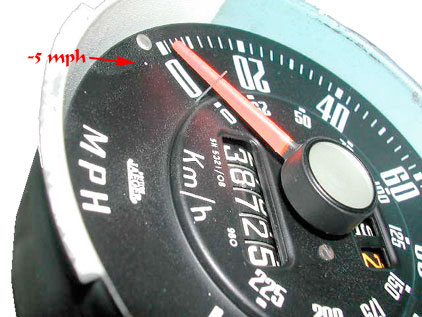
Needle against stop (note -5 mph dot near rivet)
Of course, you can check the speedo, against other accurate cars, at whatever mph you want and, add the preload to adjust the speedo to give an accurate mph at, at least one speed.
Good Luck with your new speedo.
Larry
 **
**