"4 Point Schroth Seat Belts"
An Article by Larry Paulick
June, 2002
Page 2

Sensor
If you have opted to add the retractor mechanism, then you need to mount the sensor, connect the mechanism to an ignition wired electrical connection, and add an on/off switch. Here is what I did.
1. I mounted the retractor mech on the left rear inner fender well area, in the trunk area. This was close to the retractor mechanism, was out of the way, and once installed, would not be bumped, since the trunk side cover protects this device, which measures the acceleration/deceleration, and side motion of the car.
2. A wiring harness is provided to connect the retractor mechanism to the sensor.
3. A wire for the ignition and on/off switch is then routed. I chose to use the same route as the rear wiring harness on the left side of the car. The new wire can be snaked to run along side this harness.
4. The connection is then run to a on/off switch, which provides power to the retracting mechanism. The wire is then continued to the ignition switch, which activates the retractor mechanism, when the car is running.

Switcch
5. I obtained a switch from Radio Shack, which is just a simple on/off switch. This allows you to turn the retractor mechanism off while racing, and snug yourself down.
I mounted the switch in the upper left hole in the dash for the off/on switch. The Radio Shack switch is the same size as this hole, so it just is a force fit, insert into the hole.
Results
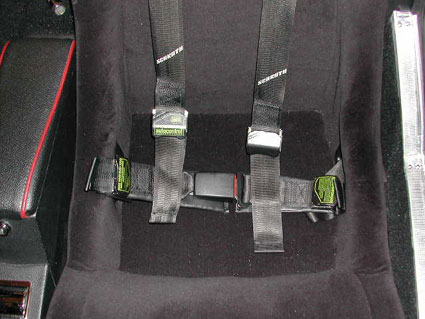
Finished Project
The seat belts are as easy to use as conventional seat belts, after you put the shoulder straps over your shoulders. The retractor is a nice feature, not found on other racing seat belts, allowing you to have the best of both worlds, street use and racing. The release mechanism is just like a normal car, and not the cumbersome mechanism found on racing belts.
This is a very high quality seat belt system. The 4-point belt the price is around $140, and $200 with the retracting mechanism. The swithch at Radio Shack was about $3, and you can complete the installation in about 4 hours.
I find the belts very comfortable, and like the security of the belts. Of course, if you race or autocross, then this is a very nice option.
Larry
|
Anyone who would like to contribute to this effort should contact us at Editor E-Mail. Thank you. |
 **
**